(‘Re-capping’ is jargon for ‘replacing the capacitors in’. Those of you who thought it meant ‘shooting the guy again’ need to realize that this is a civilized e-zine.)
An un-modded vintage speaker will perforce have vintage capacitors in its crossover network. These are usually (not always) electrolytic caps, which deteriorate with age (so has my bowling average). In extreme cases the cap has sprung a leak, but even if it hasn’t its value in microfarads has changed – changing the crossover ‘point’ that the engineer planned on, and thereby effecting the sound. That is the ‘why’ of this article.
DIY – By and for the Marginally Competent. This article, and any that may follow it, is not intended to educate experienced audio Do-ItYourselfers. If you are one of those, feel free to read on and send critical letters to the editor. (Just be aware that, for some editors, any feedback is good feedback.) The intent is to help make the use of vintage (i.e. affordable) equipment more practical for the ‘common man’.
Here is the vic, er, subject speaker:
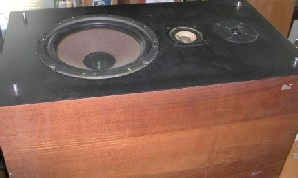
Photo #1 – The Subject
This is a Dynaco model 250, made in the ‘80s, after Dynaco’s glory days. The pair doesn’t sound very good, and probably won’t sound great after I re-cap them – but I’m curious about what they sounded like when new, and re-capping them should get the sound close to that. The boxes are solid and the veneer is pretty clean, so I may swap out the drivers and build new crossovers, ah, sometime.
One of the gurus at Audio Karma mentioned in a post the desirability of taking a close-up photo of the crossover before messing with it, to improve chances of getting the wiring right. So:
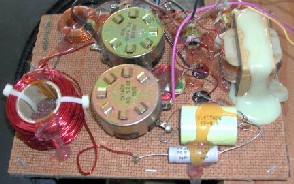
Photo #2 – The ‘Before’ Shot
I made a full-page copy of this photo for my reference, but I’m guessing that my editor would do some editing if I did that here. That little cap near the top of the photo could be a mystery, but the wiring there is obvious in fact. The yellow cap labeled ‘Electron’ may not be electrolytic, but I’ll replace it anyway. This photo also reveals that 1980s Dynaco didn’t care much what their ‘interior’ work looked like.
In the spirit of the Marginally Competent nature of this column, let’s look at the other denizens of this network. The round metal things in the middle of the board are pots (potentiometers), provided to allow user adjustment of midrange and high frequency output. Those several coils of wire are, of course, not called coils; they are inductors, also called ‘chokes’ by some people. The thing on the right side of the board, obscured by a large amount of whitish glue, really is called a coil, possibly because it looks like a transformer with only two connections. I’m not going to describe what these devices do, because we Marginally Competent folks don’t need to know (yet). I’ll just say that the presence of those inductors indicates that this is a ‘second order’ network. You can look it up on the Web if you’re curious.
A common occurrence in re-capping projects is that the replacement caps you choose (Dayton polypropylene in this case) are bulkier than the old ones. That’s the situation here for two out of three caps. Here’s the problem:
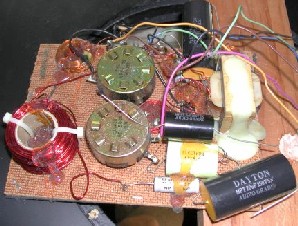
Photo #3 – The Space Problem
My plan A is to stand the caps on end – if I can find a way to hitch them down.
A couple of these connections involve wires from inductors. These wires are coated, and I need to scrape the coating off – so the solder joint will also be a connection.
Here’s the finished product:
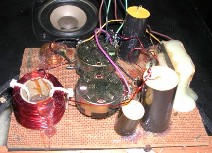
Photo #4 – Recapping complete
Not a real neat job, but it doesn’t disturb the aesthetics of the crossover network. Aesthetics are important to me.
Postscript:
Due mostly to changed circumstances, sometime during the course of this project I decided to disconnect my TV from cable (95% boring content) and convert the livingroom system to ‘home theater’. This Dynaco will be my center speaker. AR5s for the mains, and KLF 2-ways in back. The purists hate this sort of mixing, but what the hey. Don’t need a sub-woofer with the ARs in the system.
Right now my plan for next month is to put new veneer on the side and top panels of a Pioneer TX-7800 tuner. The vinyl that’s there now is in really bad shape. Haven’t done this before, so the column may be, ah, interesting. Check back.
Hello! I have a JBL speaker, 4320/ C50 with LX5 and N7000 crossover. Do you know a good way of cleaning it out? I mean, what kind of product should I use? Thank you very much indeed