Well, I was reading a bit about the Core Audio driver, which is the heart of the Macintosh OSX audio system. This driver is one hell of a trick piece of kit; in fact it has been optimised for use in studios i.e. capable of some pretty nifty bits of trick, with a host of options that once discovered, reveal some startling quality and flexibility. For some reason, I’d never even investigated the settings for either the audio driver or iTunes, which for someone who fiddles as much as me is unusual. Usually I walk every path until I find one I’m happy with.
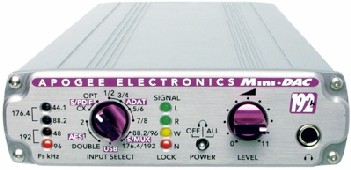
Now my DAC is capable of accepting several different sample rates on the input side, which it then clocks twice (once per clock) and then upsamples to either 176.4Khz or 192Khz, whichever relates to the input. Apparently, according to the tech guys at Apogee, whatever input is used (i.e. Toslink, Coax, AES, Firewire, etc., etc.), the results will always be the same. I’m mildly sceptical as I just changed my Toslink cable yesterday, and once again, another lift in quality. Maybe once they release the Leopard Firewire drivers, I will receive another happy augmentation in the quality department.
Input
Anyway, after trying several different settings, I settled on the following combination, which has transformed the sound, really unveilled and opened the entire audio spectrum. For you Mac bods, try this combo. Obviously, you’ll need a DAC capable of accepting the input rates and upsampling, but you’d be surprised what some DACs are capable of without shouting about it.

Now, I use AIFF format, which is entirely uncompressed and is the choice of the studio engineer. AIFF allows a huge choice of import sample rates, and as expected, the highest is the best. If you don’t use AIFF, then try it; it’ll blow you away. Yes, it uses a lot of hard drive space, but if you want the best audio quality, then this format is the one to use.
Ok, so to import your CDs at the highest possible sample frequency, you need to address the settings in iTunes; press ⌘+, (command and comma), for the preferences pane, then click on the ‘advanced’ wheel tab, then click on the ‘importing’ tab. The encoding pane should look like this:
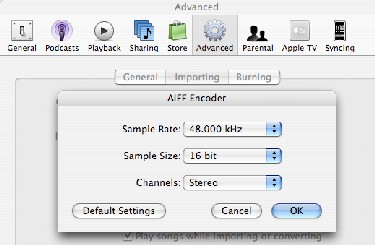
Now, this is a good time to select AIFF for importing. Simply choose it from the drop down menu. Once you have selected
AIFF, the ‘Setting’ drop down menu (underneath ‘Import Using’) will more than likely say ‘Automatic.’ This is satisfactory, but you know it could be better, so click on the drop down menu and select ‘Custom.’ This should appear:
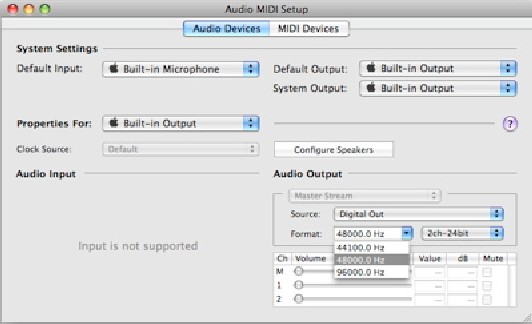
This is where you can turn up the import sampling frequency from its default 44.1Khz (or turn it down if you are pursuing a worse quality sound). By clicking on the ‘Sample Rate’ drop down menu, you’ll get the following options. Choose 48.000Khz:
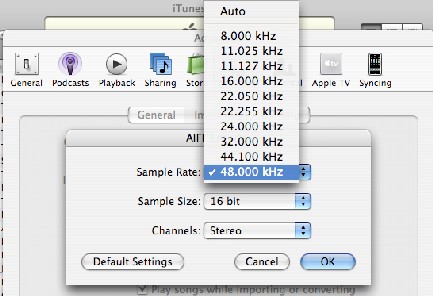
The sample size drop down menu gives you two choices, either 8-bit or 16-bit. It should default at 16-bit. Unfortunately, the Core Audio import driver will not allow the user to select a 24-bit word length. However, the internal processor can take a 48Khz 16-bit signal and upconvert it to 24-bit on the output side more on that in a moment.

So once your importing preference pane looks like the one at the top of this post, you have your settings at the highest possible import quality. Trust me, even this much makes a BIG difference. Listen to something you’re very familiar with and then delete it and re-import it using the settings as above. If it doesn’t sound better, then there’s probably something wrong with your ears. I noticed an immediate change to the sound, mostly in the upper frequencies, which, given the additional headroom created by a higher sampling rate, is hardly surprising. So this leads on nicely to the output side, which offers much more tweakability.
Output
The Mac OS allows the user to alter settings within the Core Audio driver from a control panel. This is accessed by going to: Finder > Applications > Utilities> Audio MIDI Setup. This will open up a pane like this:
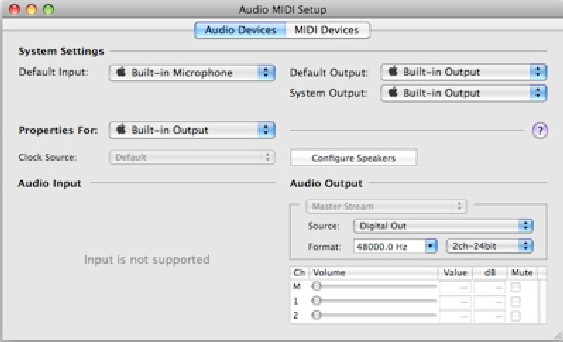
Now since you’ll be using your Mac’s digital output to go to your DAC, this setup menu will automatically have selected ‘Digital Out’ as a source with no further options (if using Toslink). Now the panel gives you a number of options with regards to output frequency and word length, both individually accessible via the drop down menus.
Firstly, the sample frequency. The options here are 44.1Khz, 48Khz and 96Khz. Choose the maximum rate your DAC will accept via your preferred connection type. (Generally DACs will only accept a certain rate for certain connections: mine will accept a maximum of 48Khz via Toslink). Since you have selected 48Khz on the input side of things, it makes sense to select the same rate, or multiples thereof, for the output.
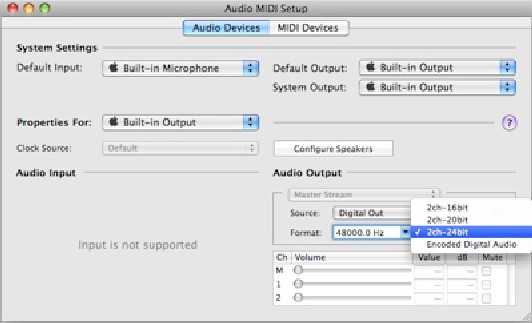
Finally, you have a choice of word length. Again, it entirely depends on what your DAC will accept, but highest is generally the best way to go. Don’t worry that the import word length potentially differs from the output word length. The Core Audio driver does all the calculations automatically and will upconvert as necessary. I’ve set my output at 2ch 24-bit, and have gotten startling results!
So, in order for the output changes to take effect, you must quit and restart iTunes. No, you don’t have to restart the entire machine; this is a Mac we’re talking about here. Once iTunes restarts, it will be outputting in full 48Khz 24-bit quality, leaving your DAC to upsample (if it can) to its highest rate.
Once Apogee releases the Firewire drivers for the Mini-dac, I will switch up to 96Khz (as Firewire can transmit a maximum of 800Mbps) and report my findings here, but if the results are as impressive as those I’ve found with just changing a few settings, then I will be a happy bunny.
from affordableaudio, By Rob Cole