One of the least discussed areas of audio and the dreaded WAF (Wife Approval Factor) is the rig cabinet. If you’re one lucky enough to have a dedicated man-cave, then you’re not likely to be worried about such matters. However, most of us are blessed with having to share rooms with our feminine life partner, which means compromise. Add to that a limited budget, and the choices shrink tremendously.
Solutions to this pressing dilemma can be simple “You married me for better, or worse”, which usually leads to a prolonged artic vacation without leaving the house. A second choice, bribery, “Ok, you can redecorate the bedroom in pinks/ lavenders.” That usually leads to endless teasing by family and friends over lost spheres of manhood. A third option, not usually employed by the male species involves taking a standard piece of furniture, and making it work as the rig stand.
While waiting to close on our new home in May, I was deliberating of how to best hold my main rig. Several thoughts came to mind; one was a small serving cabinet. My folk’s had one that they converted into a stereo cabinet, complete with doors to cover the offending electronics, better heard than seen was my mother’s motto. Unfortunately, that piece was not available. Plus, with the need to review equipment, easy access is a must. Anything behind doors means both limited space and light. Not something very conducive to swapping components.
Therefore, I began to think in terms of an open design. One thing I did want was my music collection within reach of the components. In passing, I mentioned the idea of a tabletop display. My wife, knowing that she had design ideas/colors for various rooms, quickly agreed to the idea, thus secretly storing away her advantage for future negotiations, or the more dreaded, “executive decision”.
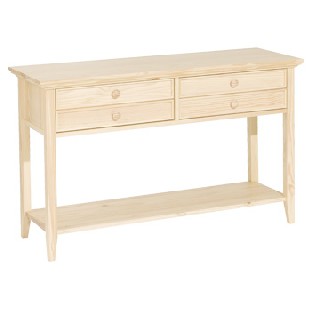
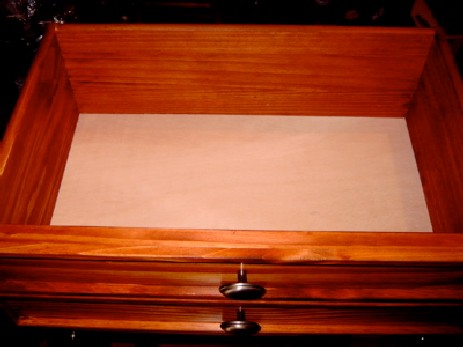
With my “victory” I began to look at various cabinet designs. I quickly found some fine examples that were created for audio equipment. However, the style was too modern and would never blend into our living room. Plus, the price was equal to a fine set of monitors. Sorry, but I just couldn’t justify that kind of a purchase. Then one day on a whim I stopped by a local used furniture store where in the past we had managed to find some quality pieces. As I cruised down the rows I saw several sofa tables, a couple with drawers. A light came on, if I could find a sofa table with a drawer big enough for cd’s that would work.
Over the next few weeks I searched every chance I could get, without any luck, unless the two models for over $1,000. Then, one Saturday the wife and I were shopping in the local discount all in one store, when I glanced at their assemble yourself furniture. Tucked in a corner was a sofa table, unfortunately, it looked to have 4 small drawers. Upon closer examination, it was only two, side-by-side. I also noticed it was made of solid pine, not vinyl. The price tag said $169.99. Not bad, but it wasn’t on sale. I filed the model away for future memory. Then walking around the corner I spotted an opened box version with multiple discount tags on it. Being the big time miser, I grabbed it, my wife nodding in approval. At the register once all the deductions were entered my final cost was $62.77. Another win for Mr. Frugal.
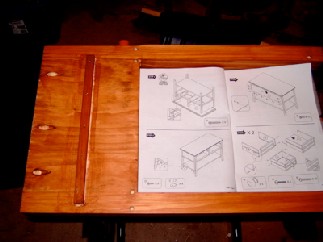
The table sat boxed for two months, as I promised that other items in our new home were priority. Finally on the 19th of July, with all the initial painting, repairing, odds and ends done, the assembly stage could begin. Like all unfinished/ unassembled furniture it is best to stain first, then assemble. Normally with pine, a light stain is best as darker stains have a tendency to absorb unevenly, even with a wood conditioner, especially given my ability. But, in order to come close to the other pieces in the living room, semi-dark stain was required. I picked the closest finish to the other pieces along with a can of conditioner.
After applying the conditioner I began staining each one of the pieces. The whole time thinking of how my now $79 total investment had saved me some $321 of my initial budget maximum of $400. Piece after piece the stain went on quite nicely, of course the sides not visible once assembled looked the best. Then, on the last piece a setback occurred. At the factory, some glue had managed to be left on an exterior sidepiece, leaving the stain blotchy. Luckily, Whittier Wood, the manufacturer has excellent customer service, and a replacement was soon on its way. Three days later I was back in business.
The assembly process was quite easy, taking just an hour or so using dowels, glue and screws. Credit to Whittier for making all the necessary pilot holes and such perfect, something I come to expect from their previous AIY pieces.
Next, I lifted the table onto my portable workbench and began wiping on the first of four coats of poly seal in a satin finish. Each coat I let dry for several hours due to the rainy conditions (normally Portland is deep into the dry summer season by now). Finally after two full days the finish was complete, but one step remained, airing the piece out. Luckily the deck has a decent roof overhang, and with the rain having moved out, the table spent the next two nights releasing the fumes, not to mention scaring off the neighborhood cat.
A final touch I added myself, in order to hide the wires (a pet peeve of my wife), I purchased an $8 piece of backing. I painted it to match the wall behind the table. Thereby giving off the illusion of no wires at all. Well, at least on casual glance. But the important thing is that I earned some return chips from the wife for being proactive on hiding the cables.
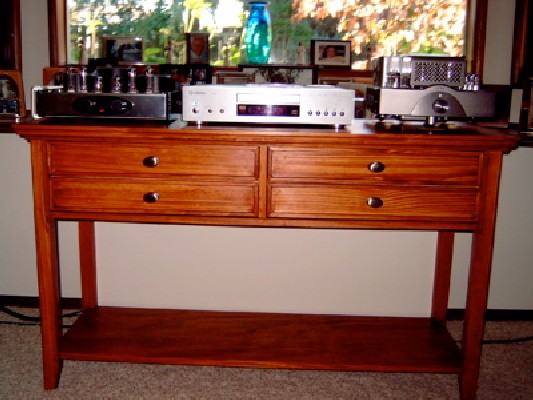
Finally, seven days after I started, my project was complete. I brought the table in and for the first time compared it to the other pieces in the room. Though a still a shade lighter than the other pieces in the room, and very simple with its straight legs compared to the rounded European legs, it works quite well. The solid wood top is a fine starting point for quality acoustics, though I still have my eye on something involving denser wood or other material, for the most solid base possible.
With its 48 inch wide top the table has enough room for three pieces of equipment side by side. Since my Jolida JD100 cd player has two sets of outputs, it was an easy choice to put it in the center. To the left I will normally have a solid state integrated amp, and to the right my Onix SP3 tube integrated amplifier. To keep the rather pointed tips of the legs of the Onix from leaving a mark, I cut three small pieces of brown cove base from a recent redo of a small bathroom. The padding is just enough to keep the soft pine from creating three craters on the tabletop. Presto, a new audio stand/table for only $87.
The final point is that with a little bit of patience and compromise a cabinet fitting of any fine décor can be had, and at a reasonable price. Best of all, I was still able to get rid of the pink walls in the master bedroom!